Call Now (704)448-6884
Custom Home Underground Plumbing
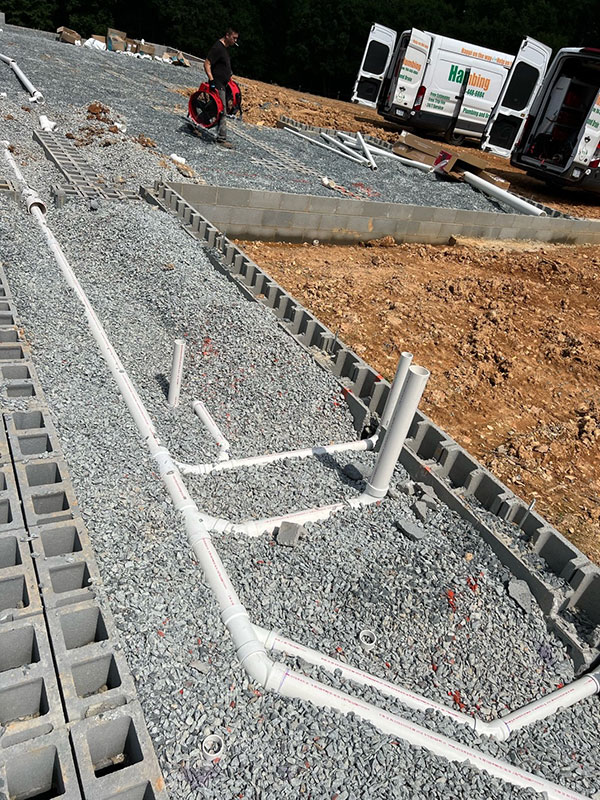
Underground plumbing is certainly nothing fancy but it’s imperative that the work be done right. This stage of plumbing is where we add future provisions and serviceability options. All fixture locations are measured precisely and pipes are installed accordingly.
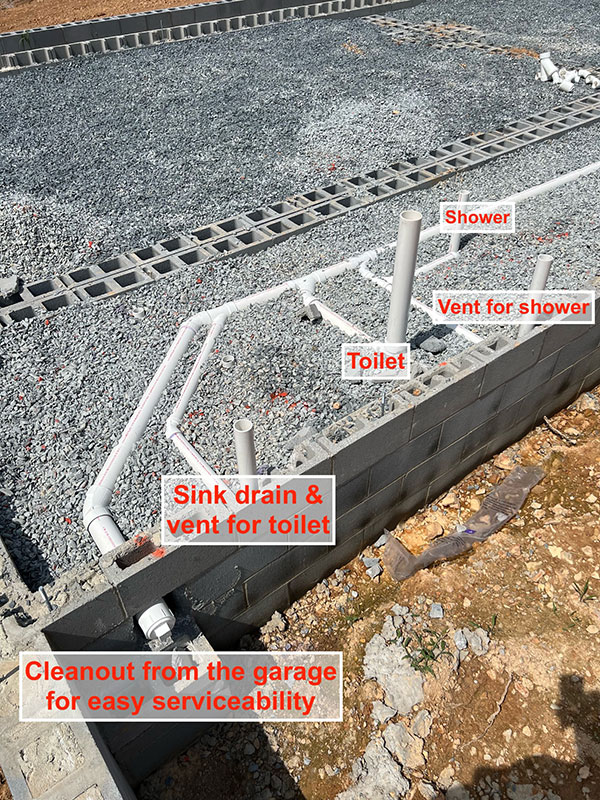
We started off on the left side of the house because that is where the highest pipe elevation is at. Knowing that we will have a 105 ft main drain line running from one side of the house and out the other, we installed a cleanup point that can be accessed from the garage in the event that one too many wet wipes are flushed.
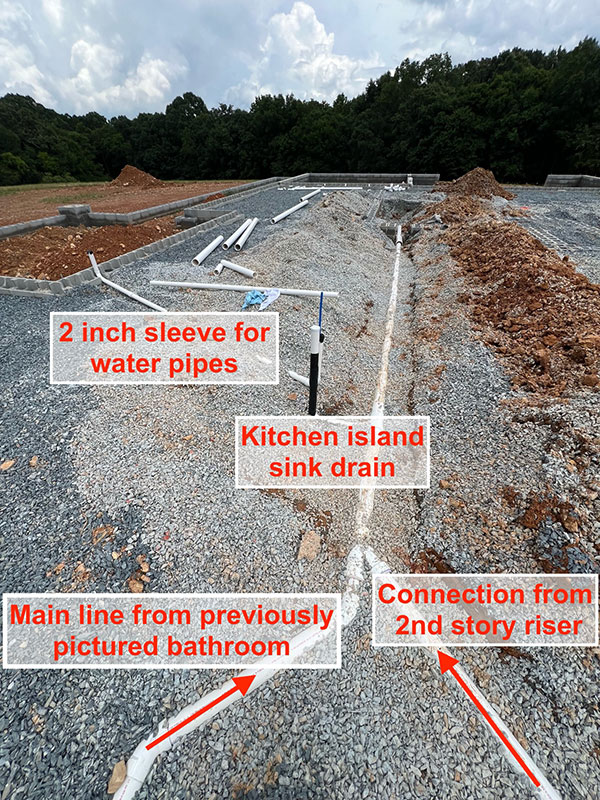
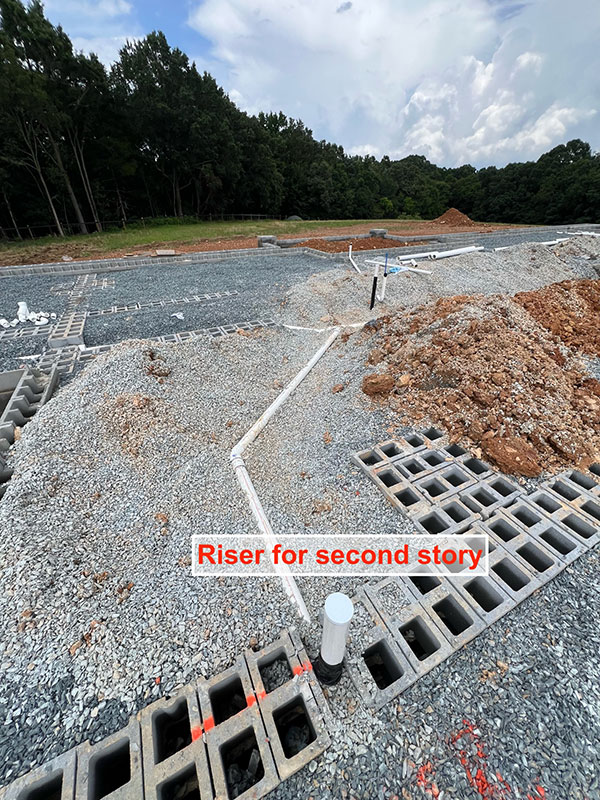
Moving downstream, we tapped in a connection from the second story riser pipe and connected the kitchen sink drain. Since the kitchen sink on an island, we installed a 2 inch pvc sleeve and ran Pex-A pipes from the nearest wall location.
Next, we have a hallway bathroom and a laundry connection.
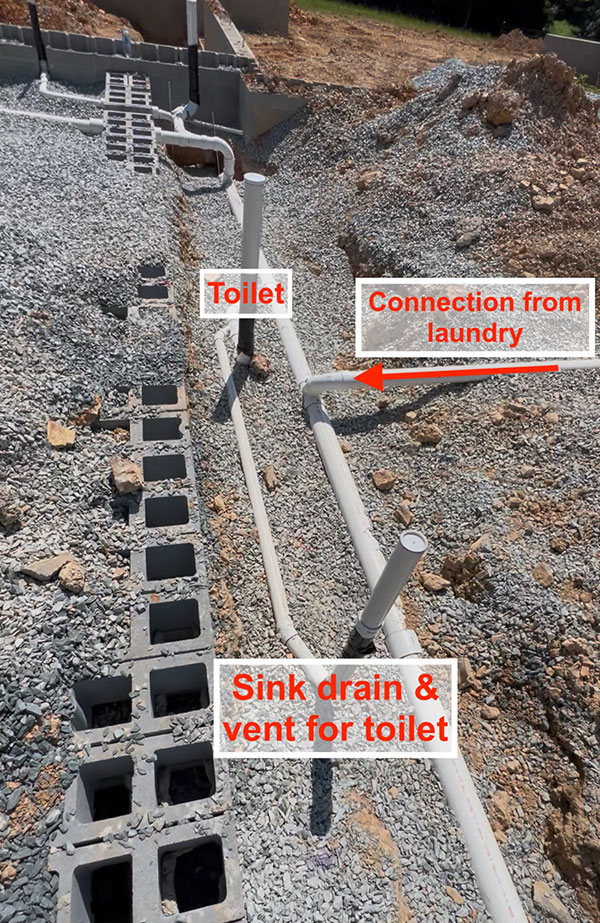
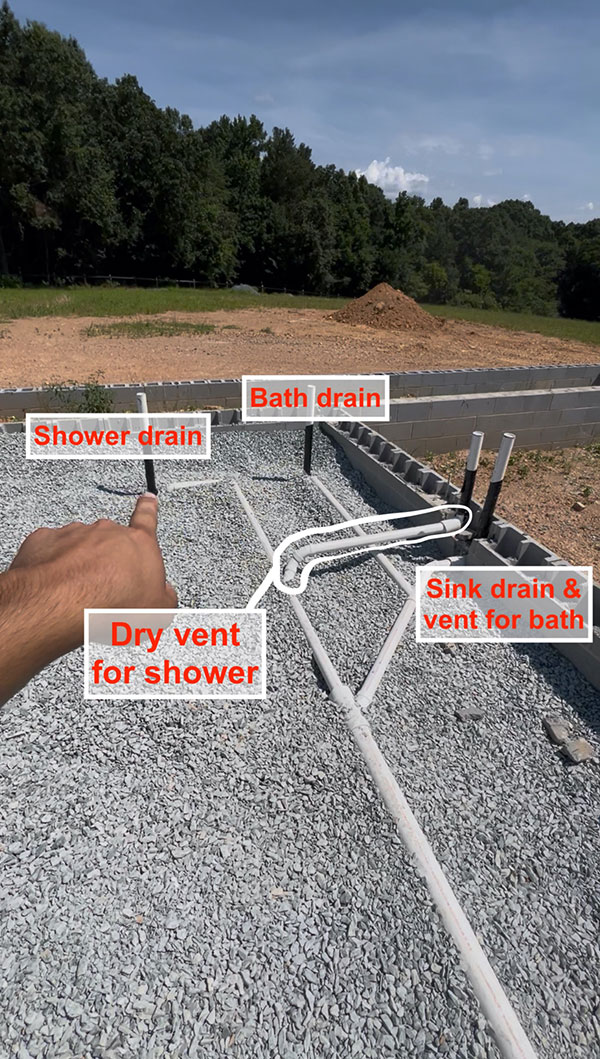
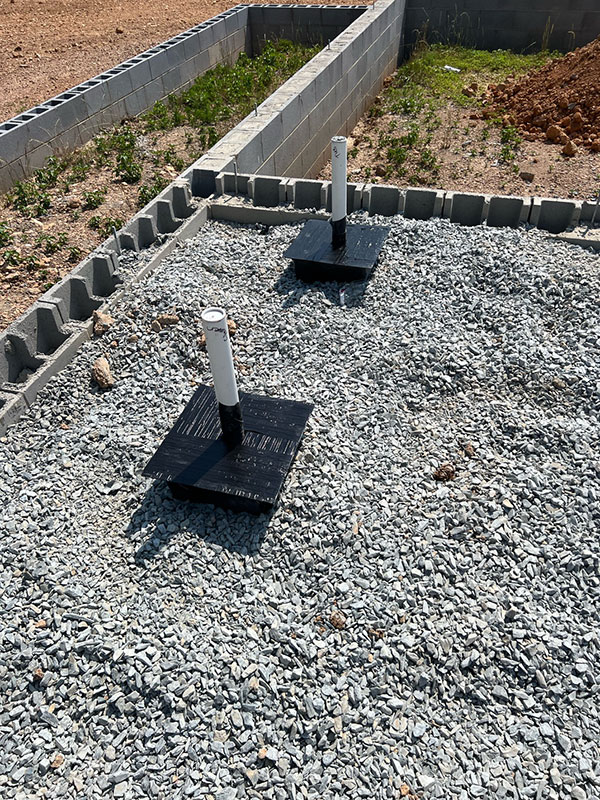
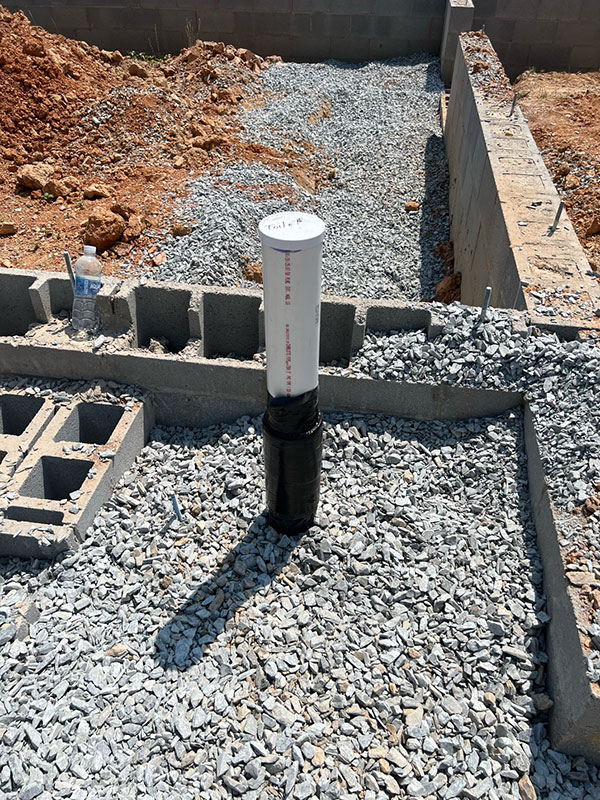
The final destination before the end of the line, is the master bathroom. Double vanity, toilet, shower & bath. The main line was significantly low, therefore we raised the elevation for the master bathroom. We had to install a temporary support for the toilet pipe while wasn’t backfilled. One of the sink drains from the double vanity vents the toilet and the other sink drain from the double vanity vents the bath. For the shower, we had to install a dry vent.

Finally, outside we installed a 2-way cleanest per customer request.
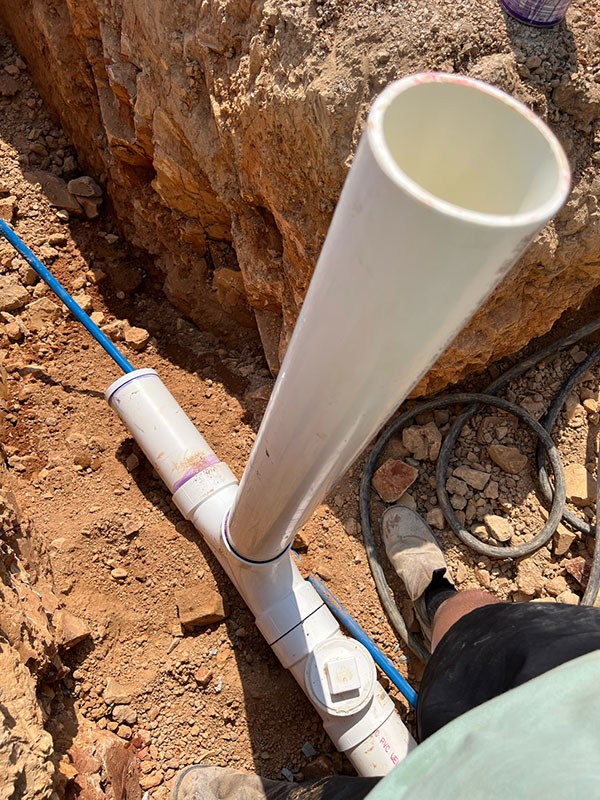
We filled the pipes with water, confirmed that there is no leaks, and called for inspection.
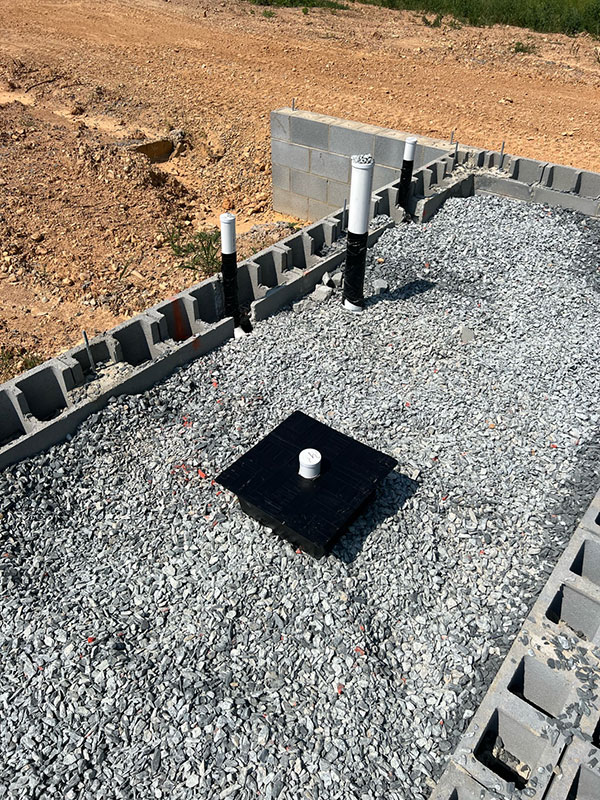
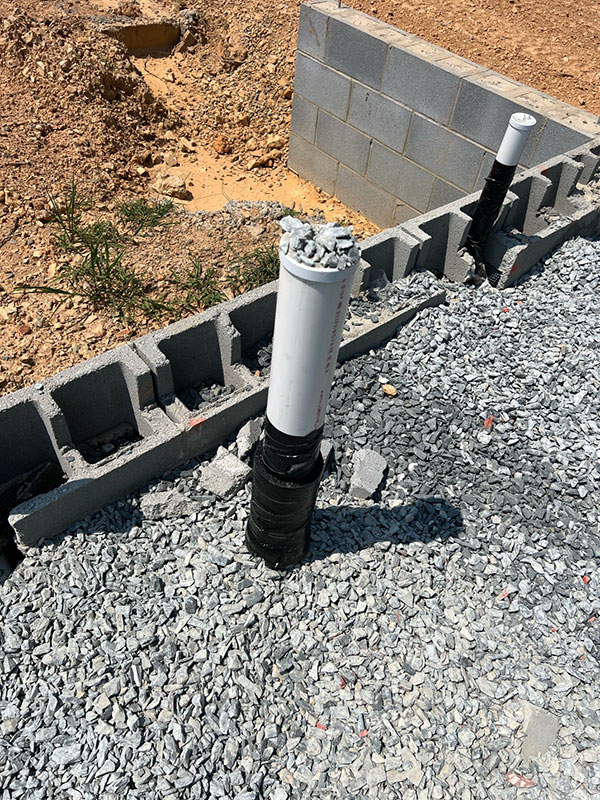
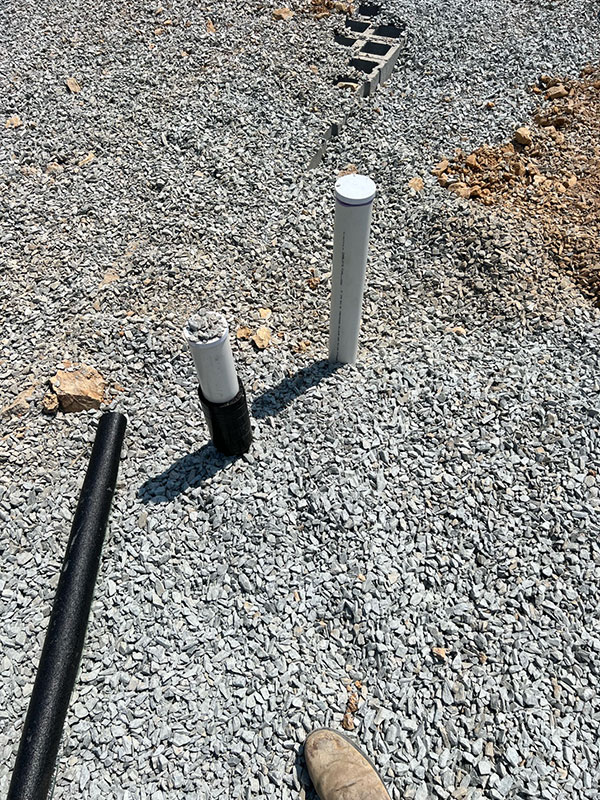
After inspection, we backfilled our pipes and compacted the gravel. Then, we installed covers over shower and bath drain outlets. These covers prevent concrete to be poured around the pipe so that drain flanges can be installed or just in case we need to move the drain. Toilet pipes were wrapped with insulation so we can create space between the pipe and concrete to install a toilet flange.
Phase 2: Rough-in Plumbing for a new house

